Session 3: multiple 7segments#
Goal#
Bonus#
Shift#
We can shift a number, multiple times like below:
number << how_many
for example:
int a = 0b10; // 2
int b = 2;

int c = a << b;
// c = 8
Change only the value of one index#
So that we know with shift we can only change one index of a number like below.
number |= 1 << which_index;
For example:
int a = 0b00100010; // 34
int b = 2;

a |= 1 << b; // 38
Another example with PORTB:
PORTB |= 1 << 2;
To make a value of a certain index of a number, we can use a code like this.
PORTB &= ~(1 << 3);
// 1 << 2 == 0b100
// ~(1 << 2) == 0b011
Conecting multiple 7segments#
In the previous session, we have learned how to connect one 7segment to the
microcontroller.
To connect multiple 7segments, we have different options.
One of the options is to connect the 7segments pins to different pins of the
microcontroller.
For example if we connected the first 7segment to PORTB and COM to PORTC.4,
we connect the other 7segment to PORTD and COM to PORTC.5.
But this way is not the preferable way of doing that.
It occupies a lot of pins of the microcontroller.
The way that is normally used is to connect all the pins of the 7segments to the
same pins of the microcontroller and connect the COM pins to different pins of
it.
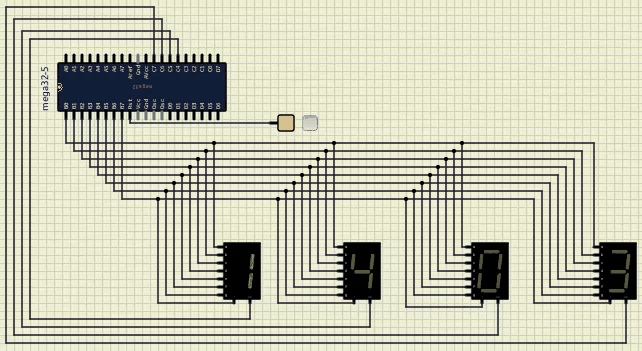
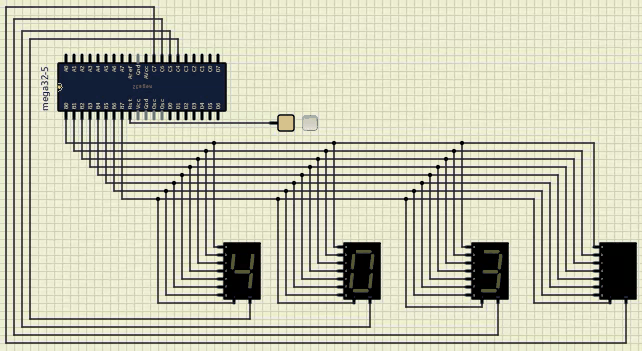
An example of it shows below:
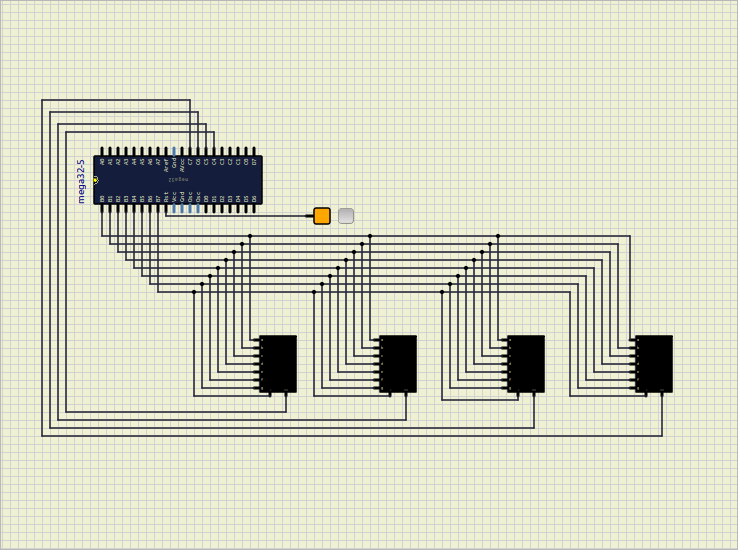
As you can see on the picture above, all the pins of the 7segments are connected
to the PORTB of the microcontroller.
The COM pins are connected to the PORTC.4,PORTC.5, PORTC.6 and PORTC.7 of the microcontroller.
In this way we don’t occupy so many pins of the microcontroller also we can generate different
numbers on the 7segments at the same time.
Show a number on one 7segment#
To show a number on one 7segment, we can simply put its respective COM to 0.
For example to show a number on the first 7segment we can have something like this:
PORTC = 0b11101111;
Show numbers simultaneously#
To show different numbers on different 7segments at the same time, we use a trick.
For human eyes, if we change the numbers very fast, it seems like they are shown at the same time (for example: 2ms).
For example if we want to show 8 and 2 on the first two 7segments, we can use the code below:
PORTC = 0b11101111;
PORTB = 0b00111111; // 8
delay(2);

PORTC = 0b11011111;
PORTB=0b01011011, // 2
delay(2);
If we put the code above on the loop function, we can see 8 and 2 on the 7segments at the same time.
Define a function to show a number on a 7segment#
So we can define a function to show a number on a 7segment like below:
void write_number(int number, int index)
{
    PORTC = 0xFF & ~(1 << (index + 4));
    PORTB = numbers[number];
    delay(2);
}
number: number that we want to show: 0 to 9index: index of the 7segment that we want to show the number: 0 to 3
As you can see we wanted an specefic 7segment to turn on regarding to its index.
To do so we wrote the code PORTC = 0xFF & ~(1 << (index + 4)).
For example, if we put index to 1, PORTC will be 0b11011111 and the second 7segment will turn on.
Replace the approach with the function#
So now we can use the function instead of write them manually:
write_number(8, 0);
write_number(2, 1);
Use loop#
To let the numbers stay on 7segments we can use a loop. For example:
for (int i = 0; i < 100; i++)
{
    write_number(8, 0);
    write_number(2, 1);
}

for (int i = 0; i < 100; i++)
{
    write_number(5, 0);
    write_number(3, 1);
}
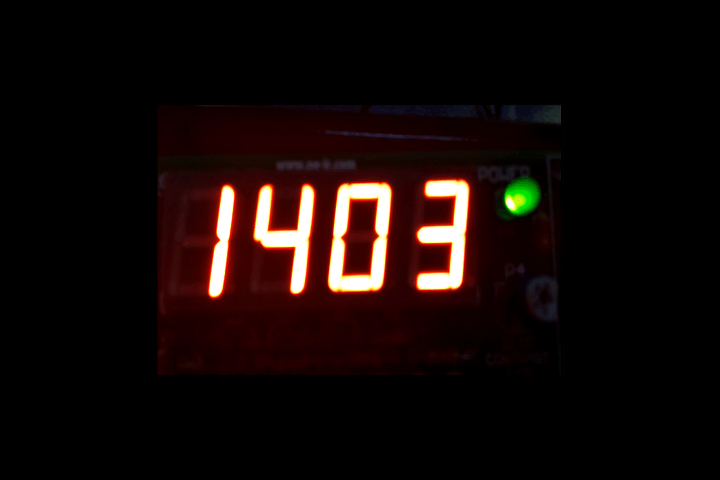
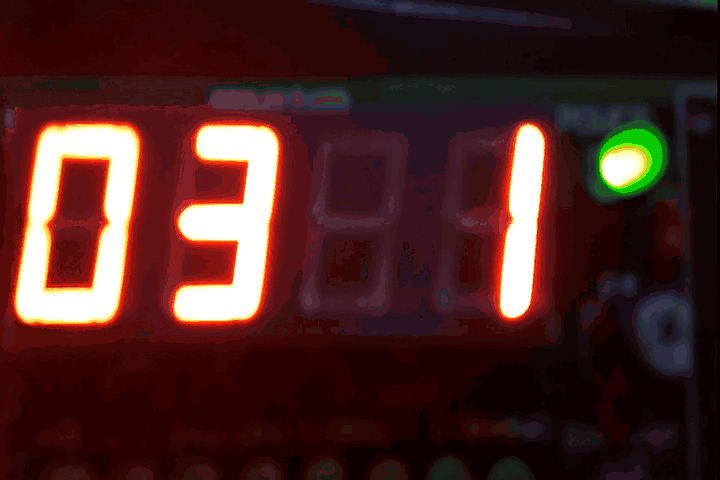
At first the number 82 will be shown on the 7segments and after that the number 53 will be shown.
To calculate how much a number stays on the 7segments we can processes it like this.
We have 2ms dealy for each number.
We write 2 numbers right now so it should be 4ms.
We have a loop that runs 100 times so it should be 400ms.
So the number 82 will be shown on the 7segments for 400ms and after that the number 53 will be shown.
Date#
Now we are ready to show the date on our 7segments. First we want the current day to be shown. After that the month that we are in it. And finally the year. This process should be repeated. Example of the execuation is on the Goal section.